Monday 15 November 2021

Celeriac and Lentils

 We are past celeriac season here in the southern hemisphere but, if you happen to have one that has not gone to seed yet, this looks like a lovely way of eating it.

I might use lovage and kohlrabi because I have all the other ingredients. I love Yottam.

"Celeriac is probably my favourite root. It is delicate, yet very nutty, and has an elegant oily smoothness. Like all good vegetables, it is marvellous simply with a bit of olive oil. Here it works with the lentils and nuts to create a hearty autumn main course. Serve it warm, with a radish, cucumber and dill salad dressed with soured cream and olive oil. Or, allow it to cool down, then take it to work for lunch or on a picnic."


INGREDIENTS

    SERVES FOUR
  • 60g whole hazelnuts (skin on)
  • 200g Puy lentils
  • 700ml water
  • 2 bay leaves
  • 4 thyme sprigs
  • 1 small celeriac (650g), peeled and cut into 1cm chips
  • 4 tbsp olive oil 
  • 3 tbsp hazelnut oil
  • 3 tbsp good-quality red wine vinegar 
  • 4 tbsp chopped mint
  • salt and black pepper

METHOD

  1. Preheat the oven to 140°C/Gas Mark 1. Scatter the hazelnuts on a small baking sheet and roast in the oven for 15 minutes. Let them cool down, then chop roughly.
  2. Combine the lentils, water, bay leaves and thyme in a small saucepan. Bring to the boil, then simmer for 15–20 minutes, or until al dente. Drain in a sieve. Meanwhile, in a separate saucepan, cook the celeriac in plenty of boiling salted water for 8–12 minutes, or until just tender. Drain.
  3. In a large bowl mix the hot lentils (if they have cooled down they won’t soak up all the flavours) with the olive oil, 2 tablespoons of the hazelnut oil, the vinegar, some black pepper and plenty of salt. Add the celeriac and stir well. Taste and adjust the seasoning.
  4. To serve straight away, stir in half the mint and half the hazelnuts. Pile onto a serving dish or in a bowl and drizzle the remaining hazelnut oil on top. Garnish with the rest of the mint and hazelnuts.
  5. To serve cold, wait for the lentils and celeriac to cool down before finally adjusting the seasoning and possibly adding some more vinegar, if you like. Add hazelnut oil, mint and nuts in the same way as when serving hot.


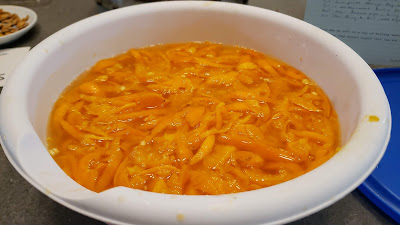
Cumquat Marmalade

 No wonder my mother's cumquat marmalade was so good; it takes 3 days to make.


Poh's Steamed Fish


Fish Soup

 I was so lucky to get some chicken stock at Crop Swap last Saturday. I used it tonight, in a fish soup. It was so gelatinous that it didn't move from the jar until it was well tilted towards the pan. This soup is seriously fabulous; made with my favourite flavours of saffron, turmeric, fennel seeds etc combined with local fish, split mung, a dash of white wine, bottle tomatoes, veg freshly picked from my garden..... including leeks, nettles....


7 Days and 7 Minutes, 100% Rye, Sourdough Bread

From my Sourdough Workshops 

This beautiful, tasty bread is one of my favourites. It needs to be made in a tin as rye has very little gluten. Start 7 days before you want to eat it!!

Day 1: weigh out 300g of organic rye grains. Put into a bowl, cover well with water and leave overnight.

Day 2: Strain off water. Place the rye grains into a damp calico bag and tie that to a wooden spoon over a deep enough bowl that it hangs without touching the bottom.

Day 3: Fill the bowl with water and let the bag of rye grains soak for 30 minutes. Put the timer on because you don’t want to kill the rye grains by drowning them! Tip the water out and let them hang again.

Day 4: Open the bag. The rye grains will probably be just sprouting. If not then repeat day 3. Once they are just sprouting, remove from the bag, put into a sieve and wash well. Put them back into the bowl and pour over 250ml white wine. Stir and leave all day.

Meanwhile you need to feed the rye sourdough starter twice during this day so you are ready to make the loaf in the evening.

To make the loaf (evening of day 4):

Strain the wine from the rye grains and save both! Beat together 200g starter +the strained wine + water to make up to 150g. Mix in 400g of the rye grains (save the rest, about 1/2 cup, to put in a soup / stew / another loaf of bread).

In another bowl mix 250g organic, wholemeal rye flour + 1 tsp salt. Stir in the contents of the first bowl. It will be a sticky dough. Rye has very little gluten so there is no need to do 2 risings. Simply grease a small loaf tin and dust it with rye flour. (I use a loaf tin that will fit inside my cast iron pot for easy baking.) Press the dough gently into the tin and make an even top. Cover lightly and leave at room temperature for 15 hours….

Day 5: Heat the cast iron pot for 30 minutes at 240C. Bake the loaf as normal…. 35 minutes with the lid on at 240C then 15 minutes with the lid off at 180C. Remove from the oven but put the lid back on and allow it to cool all day in the pot.

Evening of day 5: Remove it from the pot and the tin. At this point it will be sticky and damp underneath. Don’t worry! I wrap it in a beeswax cloth, but Dan says put the loaf in a lightly oiled, brown paper bag.

Day 6: Do nothing! Do not eat it yet!

Day 7: Ok, now you may have a slice for lunch. If it is still a little damp, wait until day 8. It will be fabulous and you will be starting on the next 7 days and 7 minutes rye bread process.


Hemp Butter

 This is delicious! I spread a thin layer of honey on toast then spread on the hemp butter. Enjoy!

From the book: Amber and Rye by Zuza Zak


Wednesday 18 August 2021

Borani Kangar - Persian Yogurt and Cardoon Dip


A few weeks ago I came across an interesting online copy of an old and rare Iranian cookbook, dating back to the last years of the 
Qajar dynasty, written in beautiful Persian Nastea'liq handwriting. This cookbook may give us a tiny glimpse into the dynasty that ruled Iran from 1794-1925. Most of the recipes are brief and not easy to follow and some of them seem to be merely a translation of European recipes into Persian. The majority of the recipes basically include the list of the main ingredients with little directions. For those who are interested to see this document please click the following link Women's Worlds in Qajar Iran.


While browsing the book, the recipe for بورانی کنگر borani kangar, also known as mast-o-kangar (yogurt with cardoons), caught my attention. That's when I decided to give it a try but the problem is that I have never seen Iranian kangar anywhere. Kangar looks like a thin celery with thorns and has a very delicate taste and they are in season for a very short time, a few weeks at most. Yogurt and cardoon dip has a distinct flavor and even though it may take some time and effort to prepare cardoons it is definitely worth it.


Luckily, a few days later I was able to find cardoons that are a good substitute for kangar in John's Farm, an Italian vegetable market. However, fresh cardoon has a bitter taste and needs to be soaked or cooked in salted water. Also, in order to prevent cardoons from changing colors during preparation they need to be placed in acidulated water. I found the following link helpful in Preparing Cardoons.


Borani Kangar - Persian Yogurt and Cardoon Dip

Ingredients:
Serves 4

1 bunch cardoons
2 1/2 cups plain yogurt
1-2 garlic cloves, minced *optional
2 tablespoons olive oil
Salt and pepper to taste

Method:

  1. To prepare cardoons remove all leaves and thorns, peel strings with a peeler, cut the stalks into small pieces.
  2. To prevent discoloration place the cardoons in a bowl of water and juice of two large lemons for ten minutes.
  3. In a large pot bring 4 cups of water to a boil on medium heat, add 2 tablespoons of salt and cardoons. Cook for 10 minutes or until tender and drain. 
  4. Chop cardoons finely by hand or use a food processor.
  5. Heat 2 tablespoons olive oil in a pan, add minced garlic and saute for 2 minutes. Then add the chopped cardoons and saute lightly for 5-7 minutes. Add a pinch of salt and pepper. Let cool.
  6. Combine yogurt and cardoon garlic mixture together, taste and adjust the seasoning. 
  7. Place borani in a serving bowl and garnish with dried mint. I also used crushed walnuts and barberries but that's optional. Serve it as an appetizer cold or at room temperature with your favorite dish or any party meals.
*Variation: Combine chopped cardoons with yogurt, mix well and add salt and pepper to taste and skip step #5 in the above recipe.

Enjoy!

Tuesday 17 August 2021

Jamie Oliver's Beetroot

 I nearly always cook beetroot this way these days. Originally, the recipe came from Jamie Oliver.


Halve or quarter all the beetroot, depending on their size. I had 4 quite big ones. Put them in a good, solid casserole dish with:

1 large handful of chopped oregano or tarragon or parsley, whatever is in season 

10 cloves of garlic, unpeeled

About 100ml balsamic vinegar

About 100ml olive oil

Salt and pepper


Put on a well fitting lid. 

Bake in the oven at 180 to 200 for about an hour or so, until nicely cooked. 

That's it. Totally delicious hot or cold.

This time I added a chopped leek and some cumquats, just because I had them.

Monday 16 August 2021

Nettle Soup

 Adapted from River Cottage


A good few handsful of nettles. Add some kale if you don't have enough.
Oil and butter
1 large onion, peeled and finely chopped
1 litre vegetable or chicken stock, or even light fish stock. I used Japanese dashi and some dried, wakame seaweed, reconstituted
1 large potato, unpeeled, cut into cubes
1 large carrot, chopped
Sea salt and freshly ground black pepper/ Tas pepperberry
(A few drops of Tabasco)
______________________________________________
Wearing rubber gloves, sort through the nettles, discarding anything you don't like the look of and any thick stalks. Wash the nettles and drain in a colander.
Melt the butter in a large saucepan, add the oil and onion and cook gently for 5-7 minutes until softened.
Add the stock, nettles, potato and carrot. Bring to a simmer and cook gently until the potato is soft, about 15 minutes.
Remove from the heat. Using an electric hand-held stick blender, purée the soup and then season with salt and pepper to taste.
Ladle into warmed bowls. Add a dash of Tabasco if wanted.


Kimchi

 I have only recently started making kimchi. My first batch is fabulous but I didn't write down exactly what I did. I watched a terrific video and I found Hugh's recipe and I sort of worked it out from there! I did Hugh's quick assembly method but added a whole daikon radish and some things from the video as well. It is definitely worth getting the Korean dried chilli flakes, called kochukaru.